Guide to Using the CodeFriends Web Coding Practice Environment
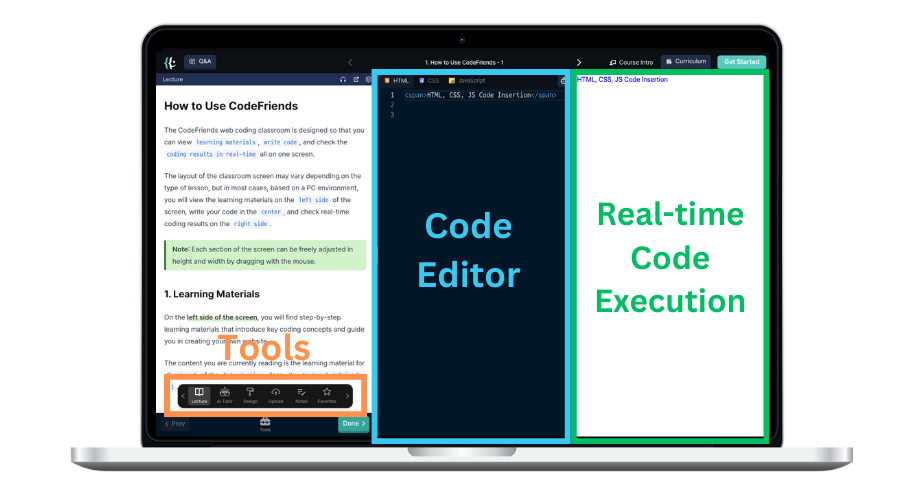
The web coding class is designed so that you can check step-by-step learning materials, write code, and instantly verify the code execution results on a single screen.
You can write Python code and verify execution results in real-time with just a web browser, without the need for complex program installations.
Each section of the three-split screen can have its width adjusted using a mouse or smartphone touch.
Screen Layout
Each section of the screen is organized as follows.
Left: Learning Materials
On the left side of the screen, you will find step-by-step learning materials that introduce key coding concepts and guide you in creating your own website.
The Quiz at the end of the learning materials helps you review what you've learned.
You need to complete the quiz to proceed to the next lesson.
Center: Code Writing
The center of the screen features the code editor, where you can write code using the three essential web technologies: HTML, CSS, and JavaScript.
As a reference, HTML, CSS, and JavaScript play the following roles on the web:
-
HTML: Defines the structure and content of a web page. -
CSS: Is responsible for decorating the web page to make it look good. -
JavaScript (JS): Acts like the brain, controlling the behavior of the web page.
In the code writing area, you can either copy/paste the code from the learning materials or type it directly.
Copy and paste the HTML, CSS, and JS codes below into their respective tabs and execute them. 🧑🏻💻
<body>
  <h1>Name</h1>
  <button id="showButton">Enter Name</button>
  <p id="greeting">Hello</p>
</body>
button {
  padding: 10px 15px;
  background-color: #007bff;
  color: white;
  border: none;
  cursor: pointer;
  border-radius: 5px;
}
const showButton = document.getElementById('showButton');
const greeting = document.getElementById('greeting');

showButton.addEventListener('click', function () {
  const name = prompt('Please enter your name.');
  if (name && name.trim() !== '') {
    greeting.textContent = 'Hello, ' + name.trim() + '!';
  } else {
    greeting.textContent = 'Please enter your name.';
  }
});
Once you paste the code into each tab, a simple website that accepts user input and displays the result on the screen is complete.
Right: Real-time Result Verification
On the right side of the screen, you can instantly see the results of the combined HTML, CSS, and JS codes in real-time.
For example, change Name to CodeFriends in the HTML tab where <h1>Name</h1> is written. 👩🏻💻
CodeFriends is structured to help you easily learn the basics of web development by providing real-time feedback on your coding results.
After completing the quiz to review the learning materials below, click the Done button to move on to the next lesson! 🚀