n8n Practice: Building Your First Automation Workflow
In this chapter, we will get hands-on with n8n quickly. Advanced concepts and detailed explanations are kept brief. The focus is on lightly experiencing the UI and introducing two of n8n's core features: Workflow Templates and Expressions.
Before we start, here are the terms we will use in this exercise:
- Workflow: A single "automation flowchart" built by connecting multiple task steps.
- Workflow Templates: Pre-built automation blueprints created by experts. These are sample workflows you can copy and use right away.
- Node: An individual step in a workflow, a box-shaped block that performs a specific action (fetching data, transforming it, etc.).
- Expressions: An "auto-fill formula" used to pull data produced by a previous node in real time and insert it automatically into a message.
Here is what we will do in this exercise:
- Load a workflow from the template library
- Add a node and configure it using expressions
- Run the first workflow
Step 1: Open a Workflow Template and Sign Up for n8n Cloud
n8n provides a quick-start template that uses training nodes, learning-focused nodes that let you test with fake data right away, without needing to configure any external integrations (credentials).
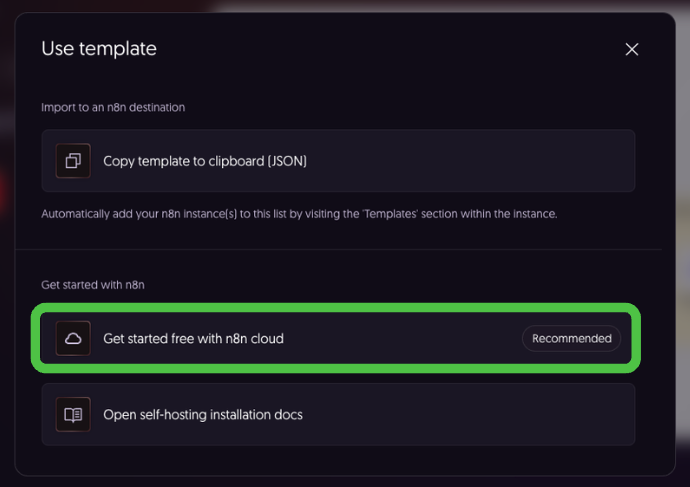
This guide uses n8n Cloud as the reference environment. New users can start with a free trial.
-
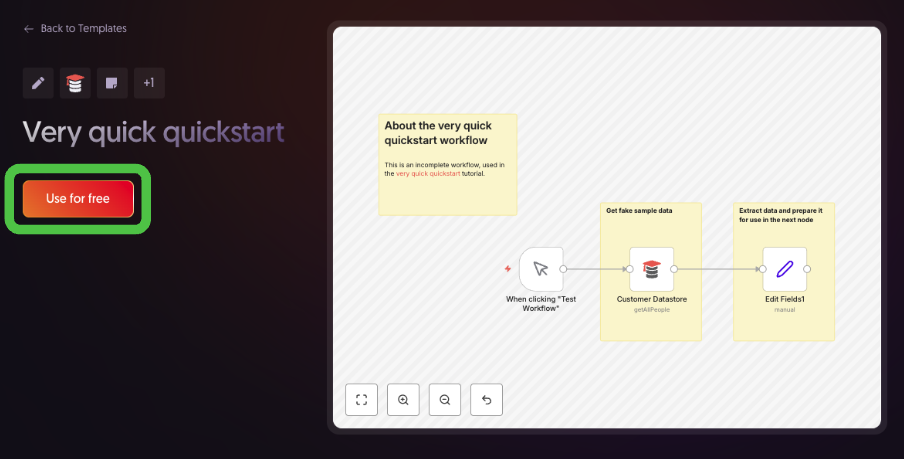
Go to the Templates | Very quick quickstart page.
-
Click Use for free to see the template usage options.
-
Select Get started free with n8n cloud to create an account and start a Cloud instance.
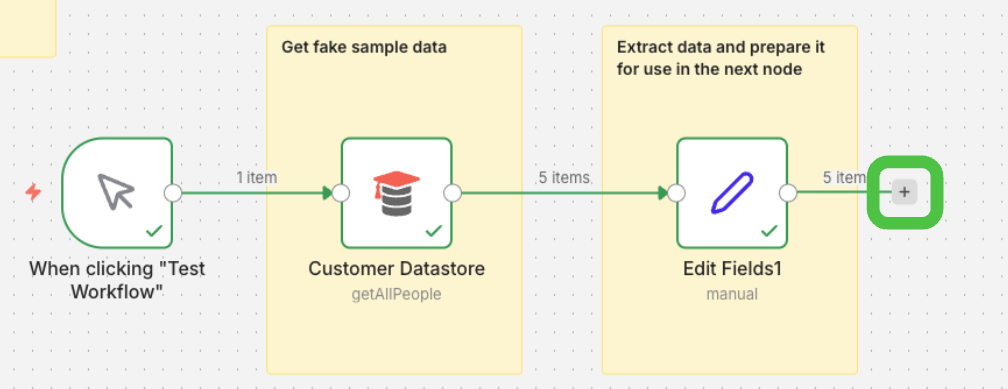
This workflow performs the following tasks:
- Fetches sample data from the Customer Datastore node.
- Selects only the needed data and assigns it as variables in the Edit Fields node.
(In this example, the customer's name, ID, and description are connected.)
The individual steps that make up an n8n workflow are called nodes. Double-clicking a node lets you view and configure its settings and data processing logic directly.
Step 2: Run the Workflow
Click the Execute Workflow button at the bottom of the screen.
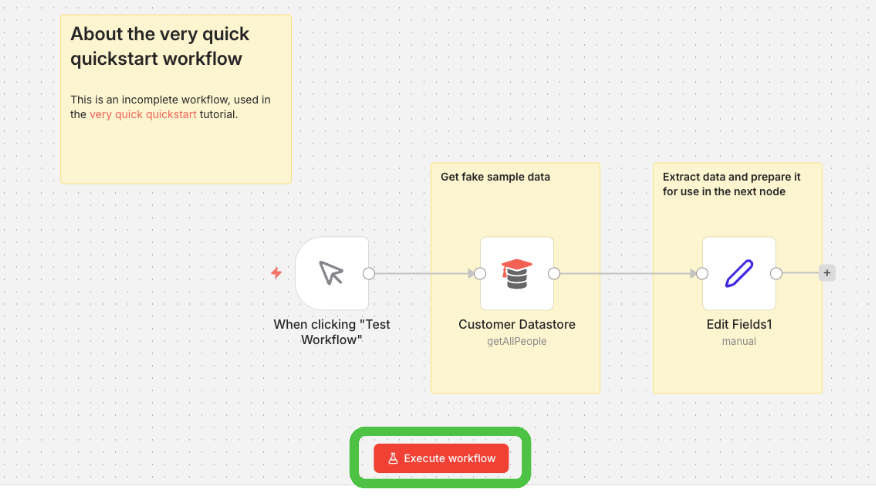
As the workflow runs, it loads data from Customer Datastore and then performs data transformation in the Edit Fields node.
Since we will use this data in the next step, the workflow must be run so the data is ready.
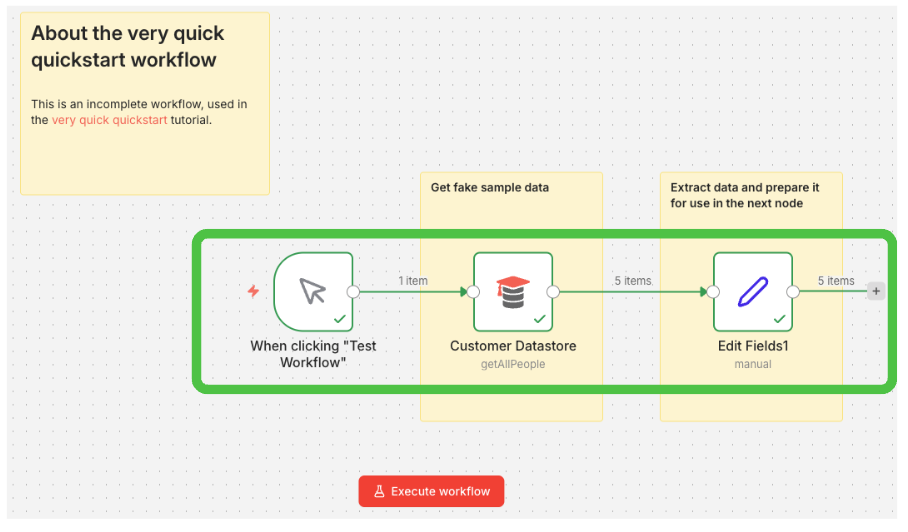 When execution is complete, a green checkmark appears as shown above.
Step 3: Add a Node
Now let us add a third node that sends each customer a message containing their "Description." We will use the Customer Messenger node to send messages to virtual recipients.
- Click the Add node (+) icon to the right of the Edit Fields node.
- Type
Customer Messengerin the search field.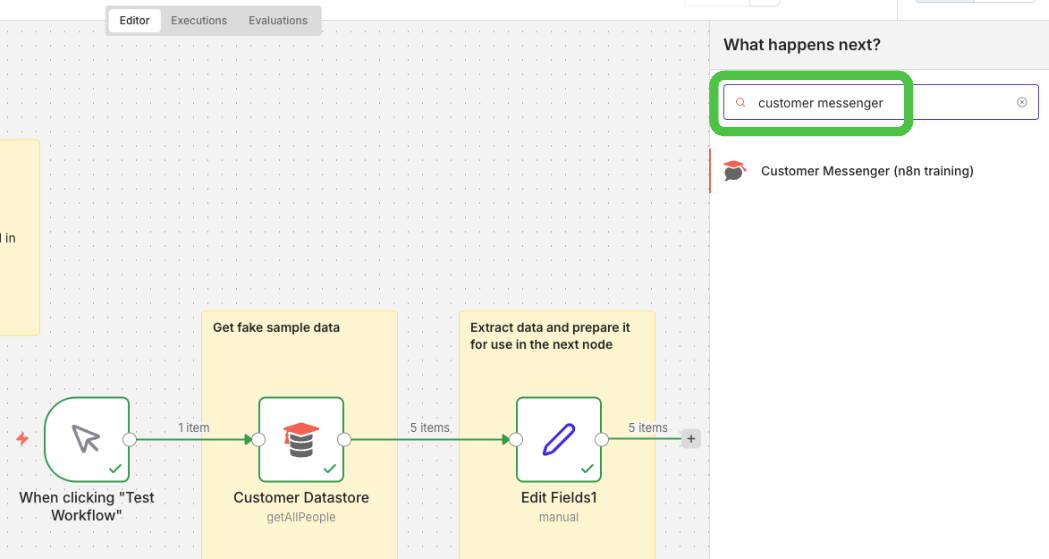
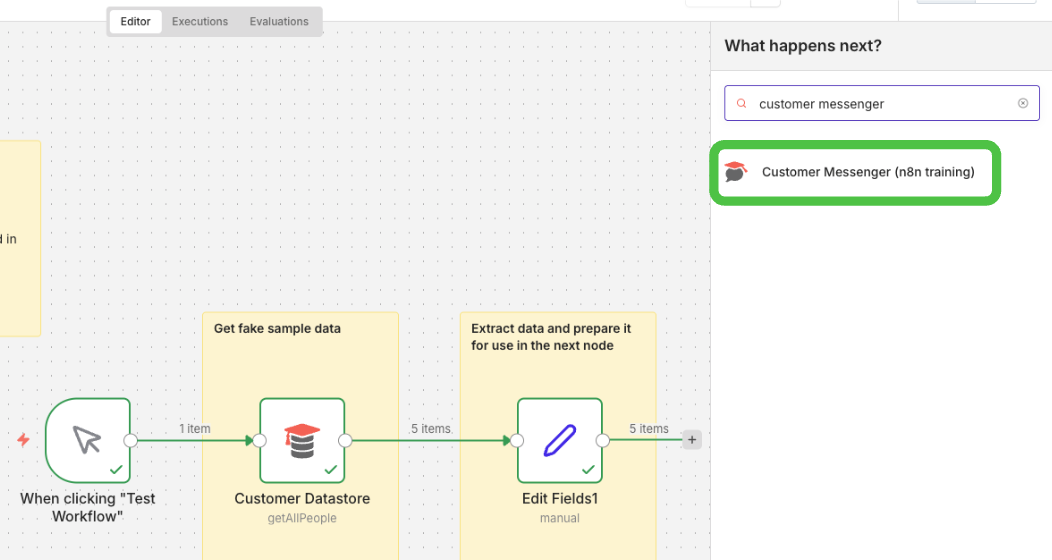
- Select the Customer Messenger (n8n training) node from the search results to add it. The configuration panel opens automatically when you select the node.
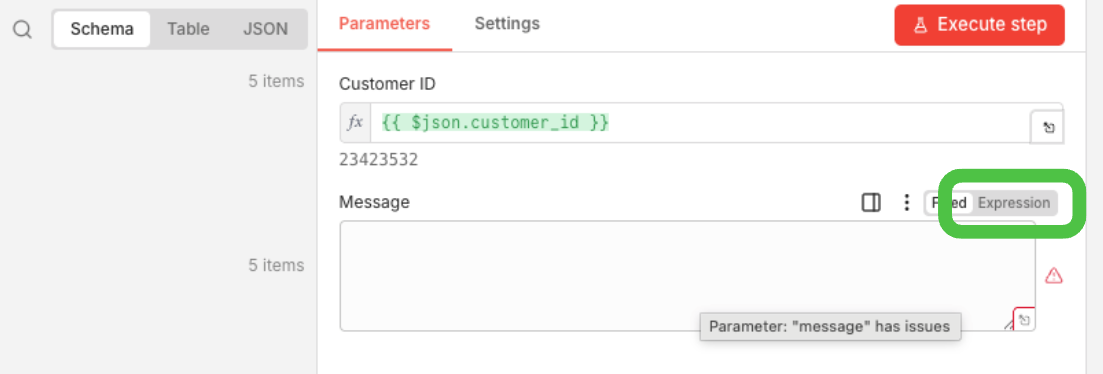
Now use expressions to connect the customer ID and compose the message to send.
- Select the Schema tab in the INPUT panel on the left.
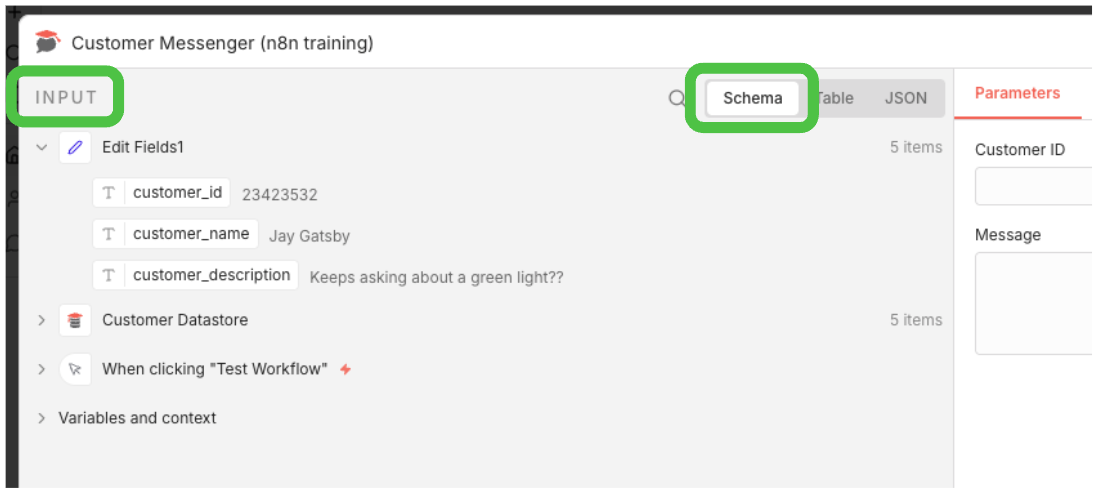
- Drag the
Edit Fields1 > customer_iditem and drop it into the Customer ID field in the node configuration panel.
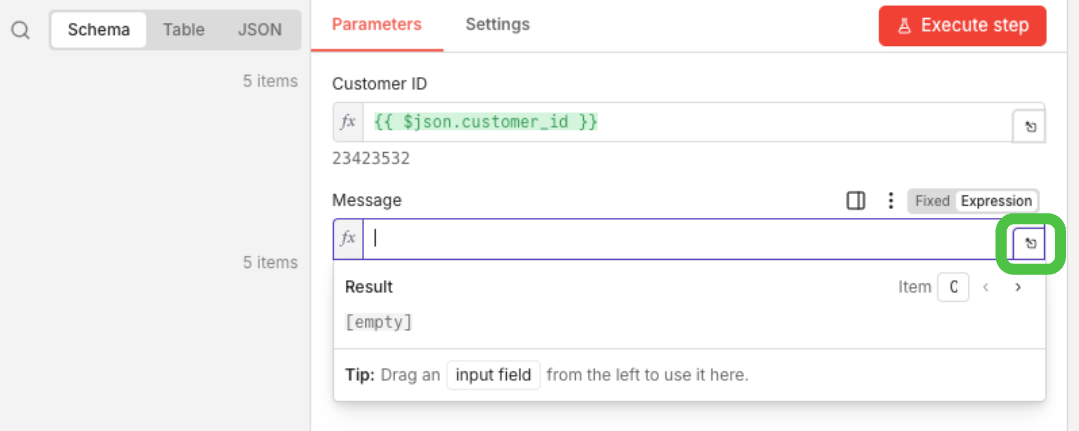
- Hover over the Message field and click the Expression tab that appears.
- Click the expand button (zoom icon) to open the full expression editor.
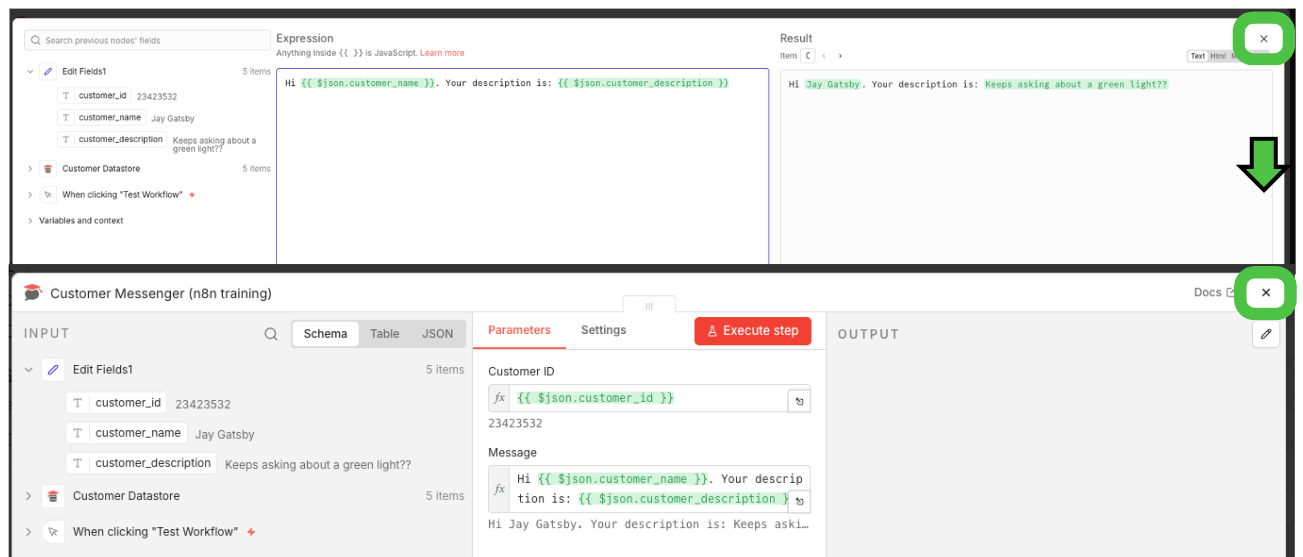
- Copy and paste the following expression into the editor:
Hi {{ $json.customer_name }}. Your description is: {{ $json.customer_description }}
- Close the editor and click outside the node or press Back to canvas to finish the configuration.
- Click Execute Workflow one more time. n8n runs the completed workflow.
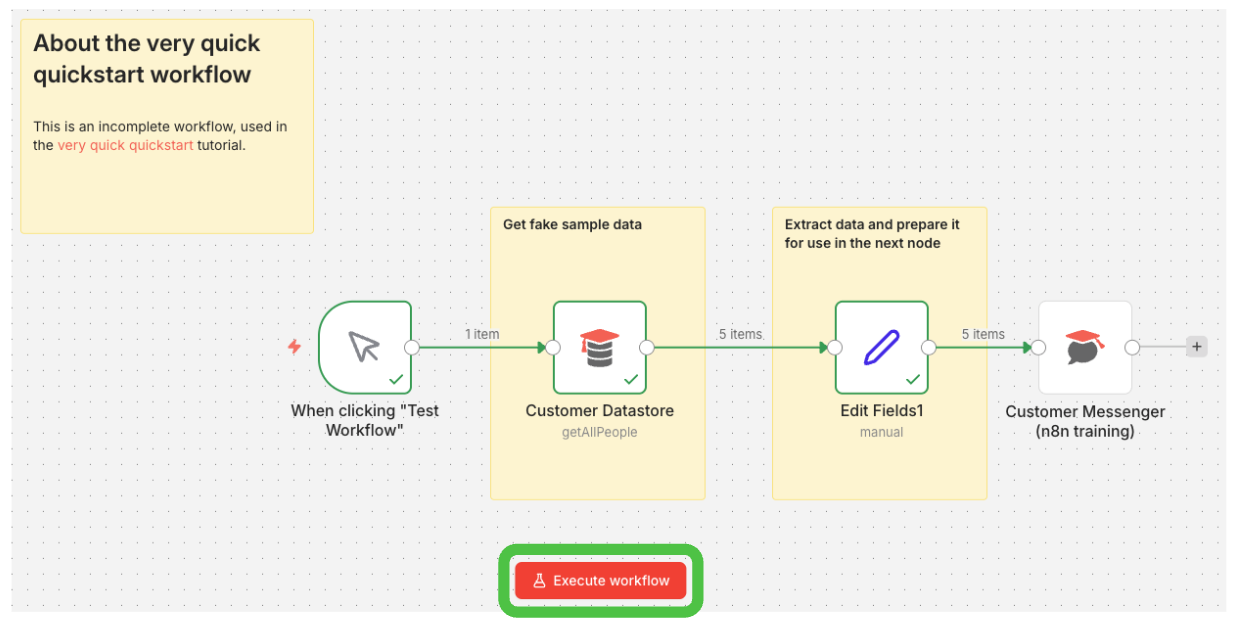
The completed workflow looks like this:
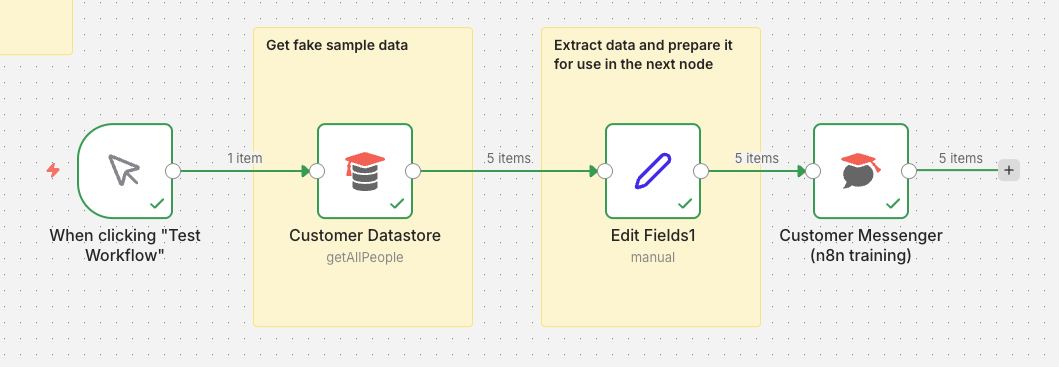
Starting from the trigger on the left (When clicking "Test Workflow"), data flows and executes in the order: Customer Datastore → Edit Fields1 → Customer Messenger.
When a green checkmark appears on each node, it has been processed successfully. The items number displayed on the connecting line shows the number of data items passed to the next node.
If you have made it this far, you have experienced, in one go, the basic flow of building a workflow in n8n (fetch data → process it → pass it on) and the way expressions are used to map values. Try swapping the training nodes for real nodes like Webhook, Slack, Gmail, or Google Sheets to expand this into an automation you can use directly in your own work.
Want to learn more?
Join CodeFriends Plus membership or enroll in a course to start your journey.